We continue playing Indiana Jones Great Circle. Last time, we only started searching for the Idol of Ra based on information from Nawal. We explored the tomb and searched for four “Stelae” relics. The stelae we found were given to Nawal, and we earned the right to participate in the excavations near the Great Pyramid.
In this article, we’ll tell you how to complete the “Excavations at the Great Pyramid” and help you solve the puzzle in the temple with sunlight and mirrors. We’ll also tell you how to defeat the blind giant guarding the “Idol of Ra” temple. After reading this article, you’ll be able to navigate difficult sections more quickly.
Excavations at the Great Pyramid.
Once at the excavation site, we need to find Nawal; she’s located at the top of the wooden scaffolding. Nawal will give us a box of ammo, and we need to continue our journey. Climb to the top where the pickaxe is. Take the pickaxe and head left to break the wall.
The optional objective is “Go Through the Tunnels.”
Next, use the lighter, follow Gina, and don’t forget to explore the room. It’s important to light everything to provide good lighting. After a while, we’ll find a tomb. We need to find a narrow passage and cross it sideways. Sooner or later, we’ll find a room with a stone pillar in the center, illuminated by sunlight.
We need to find the “Canopic Jar” that used to stand on it. This item is located in another room. When we enter the room, the grate closes. Gina will approach it, and Indiana Jones will be waiting. We need to light all the torches in the room with the “Canopic Jar” relic. Failure to do so could result in our death.
The problem is that when the doors closed, a trap was activated, and numerous scorpions appeared in the room. Our task is to hand over the “Canopic” relic to Gina so she can place it in its proper place. You can’t get through without torches. You need to take torches and scatter them in different parts of the room. This will cause the scorpions to disperse, allowing you to safely hand over the relic. After handing over the relic, the doors will open. Follow Gina and go outside.
Additional objective: “Lower the Flag.”
After exiting the cave, you can immediately go left and defeat one guard. Completing the “Lower the Flag” objective won’t be a big deal; just follow the sign. There are almost no enemies. Upon arrival, use the rope, grab the ring with the flag, pull the ring, and the flag will lower. The objective is complete.
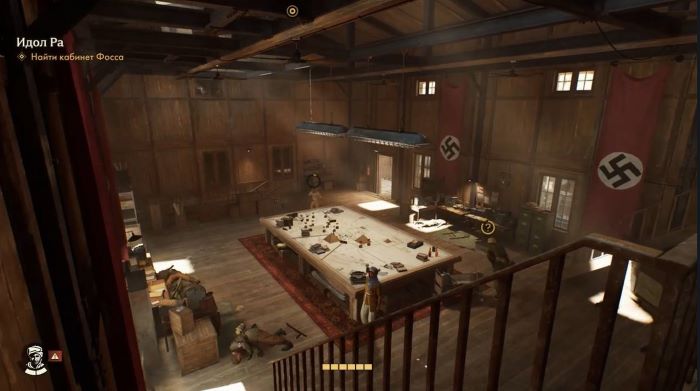
Additional objective: “Find Foss’s Office.”
After lowering the flag, follow Gina and the marker. There will be many enemies along the way that need to be eliminated. Carefully inspect the rooms and loot valuables. You can find ammunition, money, and much more. It’s worth noting that Gina can also join the battle and engage the enemy in a fistfight.
Follow the marker on the map, which leads us to a heavily guarded building. You can defeat the guards without consequences. There’s a safe in the room on the first floor, but we can’t open it yet. There’s a locked door on the second floor; to open it, you’ll need a Wehrmacht key. We’ll be able to obtain the Wehrmacht key later, when the objective “Examine the Sleep Stele” appears.
So, continue fighting the guards and inspect the building. Each time, there will be more enemies, and on the second floor, enemies will attack from different sides. Fight them off in various ways and clear the building. On the very top floor is Foss’s Office. Gina can open it herself; all we need to do is pull the door handle.
Search the Office side quest.
As soon as we enter the office, the “Search the Office” side quest appears. Carefully examine the office to find the necessary clues and continue the game. Completing the quest isn’t particularly difficult, as items are marked and the quest indicates the number of required items. In the office, you can find a letter, a document, a book, a journal, a key to the prison barracks, a note, money, and a sketch. To proceed to the next quest, you need to approach Gina and take a photo from the window.
Follow Foss side quest.
Exit the building, fight off enemies, and head toward the sign. Collect valuables and items along the way. You can find supplies, money, ammunition, and other valuables. Once we reach Foss, we’ll witness a scene where Foss accuses a soldier of treason. The soldier appears to be trying to kill Foss, but hesitates. At this point, Indiana Jones and Gina intervene.
Side quest: “Continue the Investigation.”
Gather valuables in the room, examine the giant, and photograph it. Afterward, a cutscene will begin, depicting a fight between Indiana Jones, Gina, and Foss with the soldier. Our heroes will survive the battle and will need to quickly escape the building and return to Naval.
Side quests: “Meet Naval” and “Escape the Tunnel.”
Earlier, Naval mentioned a secondary plan if we fail to complete the task without consequences. We’ll meet Naval in the tunnel and explore the tomb together. Gina will remain on the other side, as part of the cave has collapsed during the shelling. After exploring the tomb, our heroes were able to uncover new mysteries and get answers to their questions. Follow the sign and exit the tunnel.
The secondary objective is “Examine the Sleep Stele.”
After speaking with Naval, head left to a two-story building with a locked door. We mentioned earlier that you can get the “Wehrmacht Key” if you don’t skip the right room. Well, this building is the very room where the “Wehrmacht Key” is located. You can’t enter the room through the door. You need to go around the building and use the rope to climb to the second floor. Once you reach the second floor, move along the edge to the right to enter the building.
There will be a strong guard in the building who is very resistant to attacks. You’ll have to work a bit, as Indiana Jones is a bit weak. Almost all of your stamina was spent climbing and moving toward the window. However, you can defeat the enemy in hand-to-hand combat. We explore the room and go down to the first floor, where we’ll find the “Wehrmacht Key” and “Military Uniform.” The military uniform we found will help us further along the way. We change into military attire and exit the building. The key is to not run when enemies in military uniform approach, to avoid being identified as enemies.
Additional tasks: “Unravel the Mystery of the Sleep Stele” and “Find 4 Clues.”
Thanks to our military uniforms, we can safely navigate the area and inspect the necessary locations. As soon as we approach the “Sleep Stele,” we need to use the camera to take important photos. At first glance, it’s unclear what to do, as the photo of the stele itself has already been taken, but the task remains uncompleted.
To complete the task, we need to approach the “Stele” and look for 4 guardian symbols. Once found, we need to photograph the symbols to complete the task. The symbols are called “Tattoo Symbol or Symbol of the Pyramid of the King’s Mother,” “Great Pyramid Symbol,” “Sphinx Symbol,” and “Pyramid of the King’s Mother Khentkaus 1.” After photographing all the symbols, the task is completed.
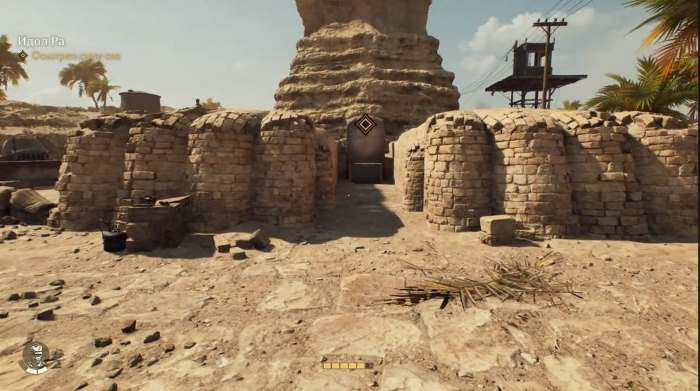
Additional task: “Look Around.”
After photographing all the symbols, a new task appears. We move to the marker on the map where the military is located, slow down, and move at a leisurely pace. We’re wearing military uniforms, so we shouldn’t be attacked. In one location, we can see a secret entrance with a clue on the wall, a symbol. We need to find a sledgehammer, break the wall, and enter the room. The sledgehammer is in a tent near the entrance. Break the wall and make our way into the secret room.
Additional tasks: “Inspect the tunnels” and “Find clues.”
Enter the room, inspect, and photograph key locations. We need to find six clues. Four tablets are located in the hall, one of which has a broken part; we need to find it. Carefully inspect the room; in one location, near the floor, there will be a passage. Indiana Jones needs to enter this passage, which contains two more tablets and a fragment of the tablet in the hall. Place the fragment of the tablet and take a photo with the camera.
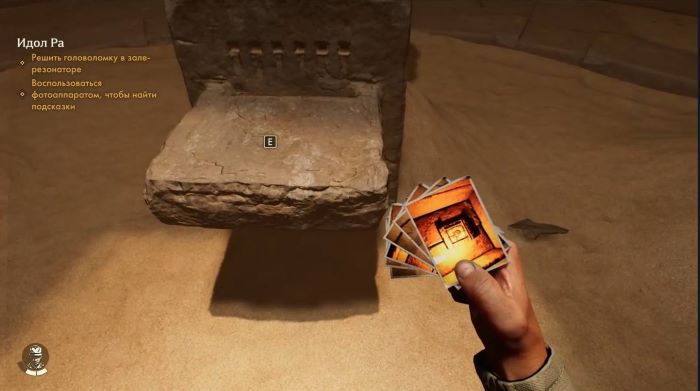
Additional tasks: “Solve the puzzle in the resonator chamber” and “Use the camera to find clues.”
After photographing all the tablets on the walls, a new task appears: solving the puzzle in the resonator chamber. Indiana Jones will prompt us to arrange the photographs on the altar. The tablets are named “Protect,” “Secret,” “Keep,” “Given to God,” “Name,” and “Oath.” You must pronounce the tablets’ names correctly. After pronouncing them correctly, sand will pour out of the holes in the altar.
The correct pronunciation of the phrase: “Keep,” “Given to God,” “Name,” “Protect,” “Secret,” and “Oath.” After pronouncing the phrase correctly, the altar will activate. The floor beneath our hero’s feet will shake, and he will fall into a secret room. Indiana Jones will survive without losing a single life. A new map, “Map of Ancient Caves,” will appear.
Additional objective: “Explore the Caves.”
Once in the cave, follow the signpost, pick up torches along the way, and photograph the paintings on the walls. Once you reach the mirror stand with the light, you need to direct the sunlight to the copper plate on the right side. The locked door should open, and you’ll find yourself in a large hall with three mirror stands, one of which has sunlight. Explore the room to find a relic.
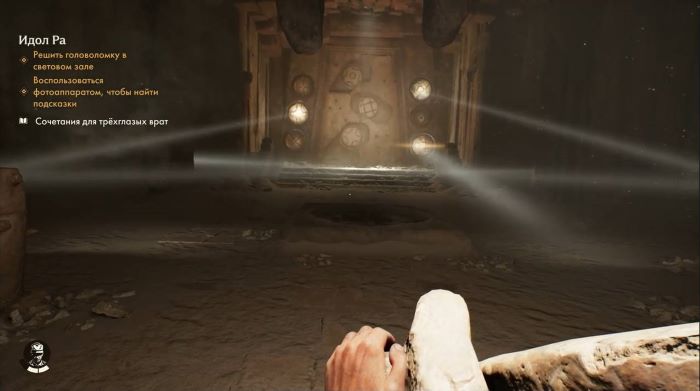
The “Three-Eyed Gate” puzzle is in the cave, in the hall with mirrors.
Our task is to direct the light to the correct parts of the wall to move the stone disks. We need to enter the room and find the light stand, which we need to rotate to direct the light into the large hall. The sunlight should be level with the stands in the large hall. Then, find another stand in the room where the mirror stand is destroyed. We find a mirror in the room and place it on another stand where sunlight shines.
We return to the large room. Now we need to manipulate the stands with mirrors to illuminate the desired spots on the wall. There are drawings on the stone and copper disks. There are six copper disks on the sides of the wall and three stone disks in the center. At first glance, it might seem like we need to direct sunlight to the stone disk in the center of the wall. However, this doesn’t solve the puzzle.
After much effort and various combinations of redirecting sunlight from the stands with mirrors, we managed to solve the puzzle. We direct the light from the left stand to the left side of the copper disk in the center. We direct the light from the right stand to the right side of the copper disk at the very top. We redirect the light from the central stand with a mirror to the lower right copper disk. After completing these steps, the stone disks will begin to move, and the large door in the center of the wall will open.
Additional task: “Go through the tunnels.”
We move towards the sign, using the lighter to see better in the dark. We find ourselves in a large room with a destroyed bridge. To get past this section, we need to backtrack a bit and find a drop-off on the left. Jump over the cliff and move on, using the rope to move a long distance.
Additional objective: “Inspect the Temple.”
We explore the room using the lighter. You can wander around the hall for a long time, searching for a light source. To find the light source and turn it on, we need to find three large discs on the floor. We just need to stand on them for a while, and the sunlight will turn on. After that, a secret compartment in the statue will be revealed. We need to approach the statue and interact with it; the light will turn off, and a giant will appear.
You’ll have to fight the giant in a very difficult battle. First, you need to quickly run across all three discs and turn on the lights. The giant will run after Indiana Jones; he’s guided by sound, so you can outrun him. It’s important to move quietly. If you examined the room, you saw a mace on the floor. It’s the only weapon against the giant.
It’s important not to move around the center where the money is scattered. This way, the giant will quickly lose Indiana Jones’ trail. The tactic is simple: run away, hide in the darkness, and wait for the giant to look elsewhere. Gradually sneak up on him and attack him from behind. Then run away and hide again. After several such attacks, we defeat the giant. After examining the body of the defeated giant, you can find the “Guardian Pendant.” Once found, place the pendant in the statue, which will open the secret doors leading to the “Secret Room.” In the “Secret Room,” we’ll find the “Idol of Ra” relic, completing the “Explore the Temple” quest.
Additional objective: “Escape the Trap.”
When Indiana Jones finds the Idol of Ra, he breaks it and obtains the relic. The trap is activated, the room closes, and sand begins to fall from above. We need to find a hole with light at the top. Indiana Jones should approach the wall with the hole above. This will allow him to escape the trap through the hole in the wall above. Once he reaches the top, he can run toward the exit. When Indiana Jones exits the pyramid, a cutscene will begin showing the soldiers taking the relic.