In this article, we will help you solve puzzles and complete difficult tasks. our opinion, the assignments of “The Crook’s Stars” turned out to be one of the most difficult when compared with the previous parts.
In this chapter, you will have to navigate the stars and approximately find the islands you need. Since clues on the location of the islands are in the sky. And the keys themselves are in the stars, which are not immediately possible to make out and understand.
Looking for keys in the stars, we recommend sailing out at night. So it will be easier to navigate and find the constellations we need.
About the assignment of the chapter “Stars of the crook”.
The quest begins on the island of “Rogue Factor”, where you need to enter into dialogue with the dealer “Sadz”. He is an astronomer and at one time kept a diary, and also knew and talked with the captain of the Briggs.
At that time, the Sadz and Briggs traveled together. And the work of “Sadza” included coordination of the direction of the ship, which he received from the star system. But, so that you can look at the stars and understand their affiliation, you need a special telescope. At the end of their voyage, the Briggs captain hid the Spyglass and needs to be found.
About the search for “Spyglass.”
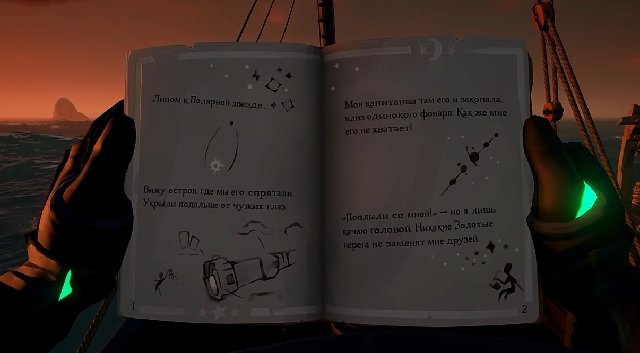
On the second page there is a hint that the chest is buried at the Lonely Lantern. And on the first page the path is indicated. first you need to find the “North Star” in the sky. then experiment a little, as the tip says “Face to the polar star.” This also does not mean that the “Back to the Polar Star” path is possible.
The polar star itself is located in the north. You need to sail to the nearest trading post and try to find the next path from it. In our case, the nearest island was the “Smugglers Brice”.
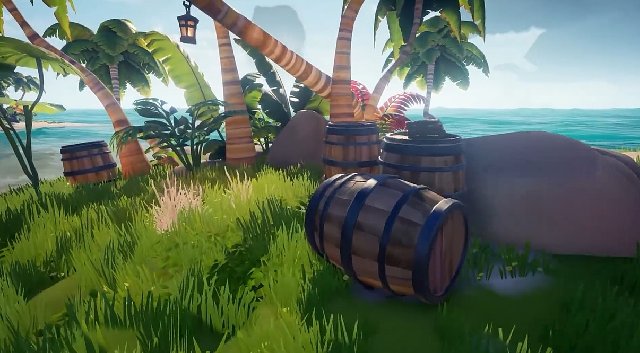
Once on this island, you need to remember the hint in the diary, where the place of the buried chest is indicated. On the island there is a lantern that hangs on a bent tree. It is under this lantern that the treasure we are looking for is located. So, the “spyglass” in our hands.
The second task is “Lost Eye”.
There is a clue in the text that the new treasure is hidden at the bottom and in the depths. And the first location for the search indicated that far from the trading post and the key of the star is “One-eyed”. One-Eyed is a constellation of the One-Eyed Shark, which is drawn on page 8 of the diary.
Once at the trading post called “Rogue Trading Post”. You need to take the pipe found using it to look at the stars. We need to find a constellation resembling an arrow. After some time, the silhouette of a shark will begin to appear in the spyglass, which will indicate the approximate location of the island.
For an approximate location and a better way, you need to look at the compass. After seeing the direction of the One-Eyed Shark. In this case, you can reduce the number of islands you are looking for. If you look at the Global Map, when you get closer to the approximate place, there will be several islands.
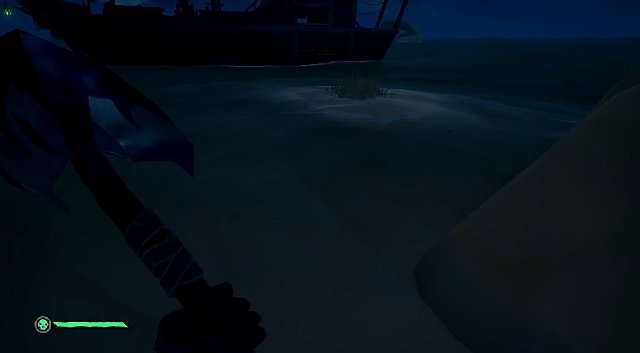
And in our case, this island turned out to be Shark Feed Bay. When you find yourself on this island, then immediately open the diary with the first tips on this task. It was indicated there that the place of the treasure is at a depth and at its bottom. So on the island you need to look for a lake.
At the bottom of the lake is a stone “Gem Star”, we take it and continue the path. On this, the Lost Eye mission is over.
The second journey is called “The Trick of the Serpent.”
On the first page of this quest is the island on which we need to sail. And the constellation, which can indicate the approximate location of the island, is the “Snake”. You can try to find this constellation using the “Spyglass,” from where you are.
And in this case, the island will have to search and swim in the vicinity. Since the constellation “Snake” in the sky will indicate an approximate location. In our case, the island “Piercing sandbank” turned out to be. And if you don’t have a desire to wander in the open sea, then go straight to the piercing bank island.
Once on the island, we had to wave a little shovel to find the right place. The treasure is located near the stone, on the smallest islet on the island “Piercing sandbank”. After the excavation, another gem, “Gem Star,” will be found and the task is considered completed.
The third journey is called The Elusive Story.
The diary immediately indicates the island on which you want to sail. And the constellation, which indicates its approximate location, is the constellation “Glowing Fish”. Such a constellation can be found in the diary, where it is said that the “Luminous Fish” indicates the path of the ancients. On the same page it is written that there is a tunnel under the island. So we need it there.
In our case, there was an island on which we sailed earlier. When looking for the wrecked ship “Magpie Wing”. The coordinates of the island N13; O14, in the center of these coordinates.
Sailing on this island you will need to find a tunnel under the water, at which the entrance to it begins with a stone gate. After swimming underwater tunnel, a cave appears, in which there is a stone totem. In this stone totem, in the form of a head, you need to insert the found “Constellations Star”. So, grab a chest with these gems right away.
The found “Constellations Star” need to be inserted into the eyes of the stone totem. And then he will open his secret place, where there will be a small figure “Crab”. And in the diary there will be new entries. we take this figure and continue the path.
Being in the same room you need to find a place to install the found totem “Crab”. And this place is located next to the painted drawings of “Crab”. After installing the totem in the right place, a new passage in the wall opens.
Passing into the new passage, we will meet the same altar that we passed in the previous part of the story “The Divider of the Veil”. As last time, we first need to light a place on the Altar with a lantern and press the button on the Altar.
This time we will also need to select the necessary combinations on the stones in the form of constellations. And the room will also be flooded with water. But, this time it will be necessary to solve the riddles that are on the last page of the diary.
The first combination on the stones.
diary says the first line “The Queen of the Sea has entered into a conspiracy.” This is the constellation “Sea Queen”.
second line of the diary entry, “With the One-Eyed Spying”. It is more reminiscent of the constellation One-Eyed Shark.
third line in the diary entry, “They were going to kill the teacher.” The constellation Iron Scarab is more suitable for this phrase.
fourth phrase in the diary, “And his two-legged disciple.” The name man is suitable for this phrase, and from the constellation this meaning “Great Warrior” is more reflected.
The second combination on the stones is indicated in the second paragraph.
The first line of “One-eyed attacked under cover of night.”
“One-eyed shark.” The man fought with a shark and supposedly Megaladon. A shark falls under an approximate description of this action, and of the existing constellations “One-eyed shark”, it is the closest in value to the key in combination.
Second line “But the warrior was waiting for this and won the battle.” Constellation “The Great Warrior”.
Given the victory over the One-Eyed Shark and the fact that a man was fighting with her. The closest suitable constellation is the Great Warrior.
The third line is “He made a weapon from the tooth of a defeated enemy.” This is the constellation Obsidian Arrow.
In the diary of all the constellations listed, the Obsidian Arrow is made from shark tooth. And as we already know, man defeated the shark. Based on this, the closest suitable constellation is the Obsidian Arrow.
The fourth line “And went in search of the enemy for stronger.” Constellation Great Kraken.
In terms of the fourth clue, the second combination is a bit more complicated. The fact is that the clue is right next to the constellation Obsidian Arrow. It says that this arrow pierced the heart of the Kraken. It is also known that another sea monster after Megaladon is the Kraken. Based on this, the next key is the Great Kraken.
About the ending.
After all the necessary combinations are typed, you need to press the “Altar” button and the water should go. And before you open a new secret door made of stone. In the opened cache is another “Gem” for “Curtain Divider”.
To complete this story, you need to return to the island “Factor of the crook” to the merchant “Sadz”. Which will inform you that the “Gem” will be transferred to the “Mysterious Stranger”. And on this story, “rogue stars” are considered complete.