In previous stories, our hero was in search of parts for the “Divider of the Veil” totem. On his way were dangerous opponents and guardians of pieces of stories from the past. This time, our hero will try to go and walk to the legendary island of Golden Coast and solve mysterious puzzles.
At the beginning of the assignment, you need to arrive on the volcanic island “Devil’s Throat” and talk with “Grace”. In a conversation with her, we learn that the “High Pirate” himself warned her about our visit. And the fact that at one time Grace might have the opportunity to visit the island of Golden Shores.
Grace gives us important news on the restoration of the Curtain Divider. And gives valuable advice that you can hold out for a very long time while the “Curtain Divider” is on the ship. So you can get to the goal with minimal problems. Gives us the “Divider of the Veil” and the autographed book of the High Pirate.
About diary entries.
In the diary we learn that the “Golden Coast” was once called the “Rock of Remembrance”. The great pirate spoke about the dangers on the island, in the form of the “Devil’s Veil”. Which we will need to defeat or survive on reaching the island.
On the island of “The Rock of Remembrance” a passage was once formed, which was used by a greedy pirate. And when he was on the island, he completely changed. The diary indicates the task of destroying the darkness on the island of Golden Shores. And if we manage, in the taverns they will sing the songs of the bards about our victory.
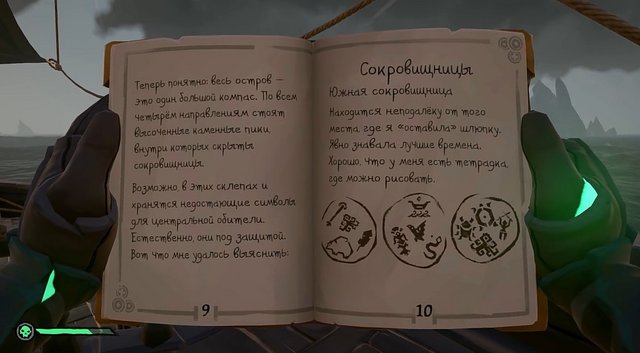
It turns out the pirate “Briggs” was on the island of Golden Shores. But for some reason, in the previous Briggs stories, we had only part of the Curtain Divider key, and not the full path to this island itself. The records indicate that the island is considered sacred and there are places where you need to insert medallions.
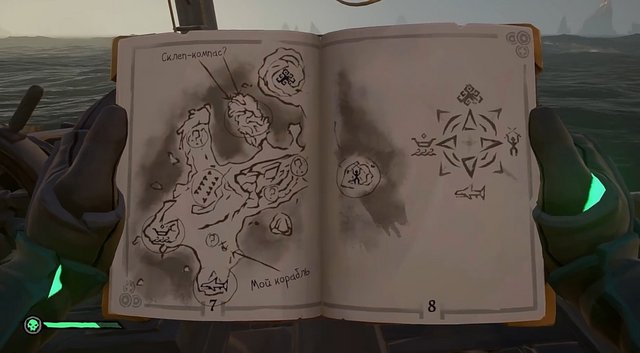
From the entries in the diary, we can say that the “High Pirate” had the most valuable information received from the Briggsi pirate. Since there is a map of the island and clues, where are the necessary parts for the main monastery. There are about 4 treasures on the island where medallions can be.
The southern treasury is located in the Briggsi boat area. The eastern treasury is protected by someone. Northern treasury, it is said about something the same of 4. Western treasury. When the Briggs explored the island, it was discovered that someone had already been there.
About the approximate location of the “Golden Coast”.
Interestingly, the diary does not indicate the exact location of the island. At the beginning of the assignment, Grace said that the Curtain Divider would help to swim to the island. We chose the course to the North, where there is an undisclosed part of the global map.
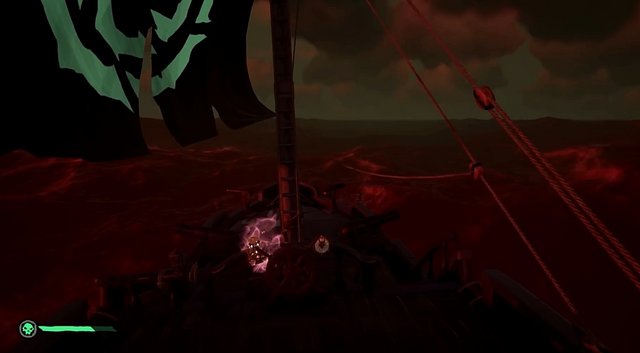
Along the way, the water around the ship turned red, and the “Curtain Divider” began to glow. Through the spyglass, the silhouette of the island was discerned, after which it disappeared. After a while, a red fog appeared. And closer to the island, the lighting returned to its previous form.
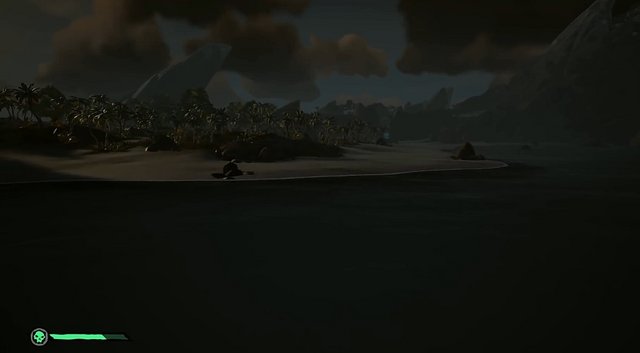
On the island of Golden Shores.
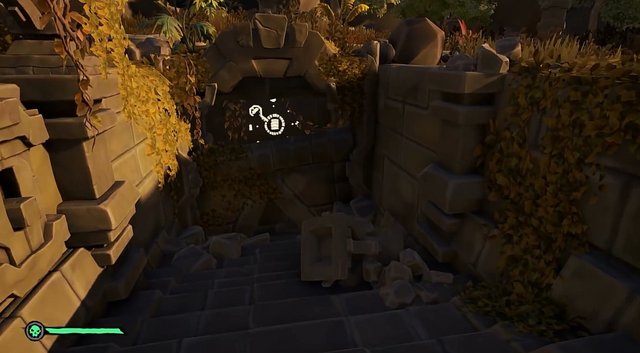
Having landed on the island you need to immediately look for the boat or the Briggsy ship. Near the ship there will be skeletons that are not difficult to figure out. From this place you can look at the island’s court, which is indicated in the diary and select the desired direction.
Shark cave.
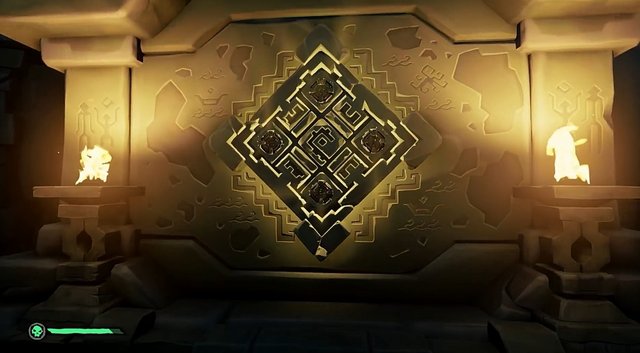
We went to the nearest indicated place, this place is marked as fish on the map. In the rock there is a cave in which there is an altar, which is familiar to us from the previous parts of the stories. Only in this “Altar” three key combinations of four are active. The combination key is listed in the diary on page 10.
After activating the “Altar” the doors close and the flood begins. Water gradually fills the room where the Altar is located. To stop the water and open a secret room with the “Medallion” you need to dial a combination three times. What combination will be in your case, we do not know, since one key out of 4 is broken.
To activate the “Altar” you need to light a lamp with fires in its corners. And then click on the button in the center.
The first combination: arrow, kobanchik, kraken. You do not need to touch the third stone, since it is broken.
second combination: a mermaid, a sea with a ship, a snake. The third stone also does not need to be touched.
The third combination: turtle, frying pan (bug), kraken.
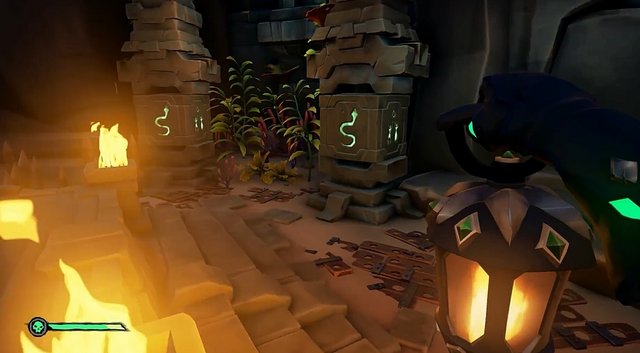
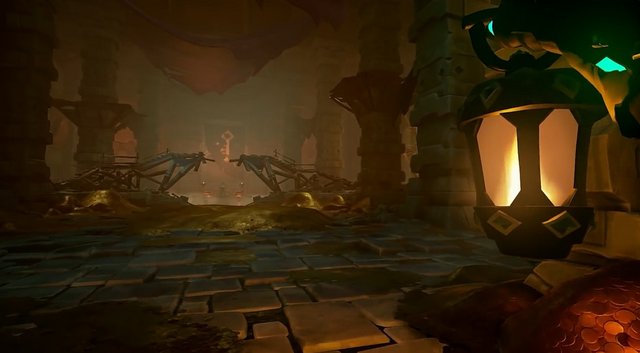
Eastern Treasury. A cave in the East, a ship with the sea.
Inside the cave there is the same room with the “Altar”, only when activated, a map with the right places appears on it. And in the diary these places are indicated as question marks. That could not find “Briggs” and could only redraw the secret places in the diary.
In one of the places is a statue and two stone switches. This statue needs to open its mouth, there is drawn one symbol of the key. After it, you can safely run and follow the buttons next to the torches. Which are in other places indicated on the map in the diary.
Having run around the island we found buttons in the indicated places. By clicking on all available buttons, including at the very top of the island. Where there is a broken underground entrance or the door is half open, some map is drawn there. And nothing else happened.
After that, we returned back to the “Altar”, where the necessary places were obtained. In the cave around the “Altar” has already appeared the opportunity to gain combinations on the stones.
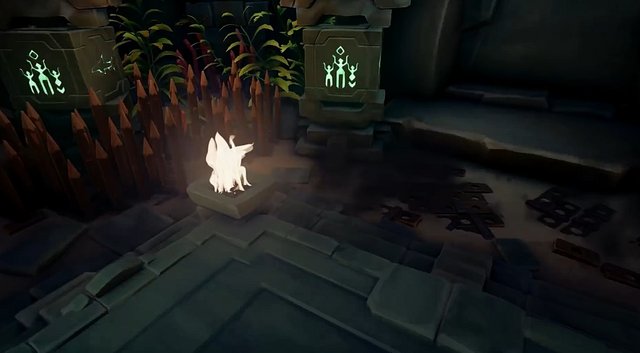
In the cave there is a room with the “Altar” and traps – spikes. You must also enter a combination and be careful that the stakes do not cause damage to the character. From the prompts in the diary, you need to enter 4 identical keys. No other clues were found.
To solve this cipher, I had to rotate all the blocks in stages. And look for where there is a symbol that can be found on all stones. The task was not easy, but I also had to run from the spikes. You need to work carefully, since the spikes can kill a character with one hit.
To open a secret door, you need to enter 4 identical signs several times.
The first combination. This is a combination of Snakes.
The second combination. This is the “Three Men”.
Of all the treasures available, the Kraken treasury in our opinion was the most difficult. After entering all the necessary combinations, we find another “Kraken Medallion”.
Western treasury.
As in previous treasuries, in the center of the room is the “Altar”. After its activation, the room begins to fill with water. According to our assumption, water filled the room faster than other similar places.
To solve the riddle and find the key combination, you need to carefully inspect the room. The hint is in the room itself, this is a drawn “Key”. On the stones themselves, you need to collect a picture resembling the shape of the key that is drawn on the wall.
If everything is done correctly, a secret door will open in which there will be a “Medallion of a warrior”. We take it and come back.
Secret room with a lock for Medallions.
Before starting the installation of the found “Medallions”, they must first bring everything to the place. And then install it. It will be easier.
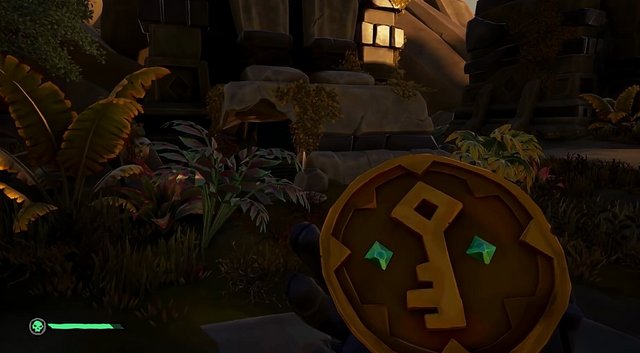
When all the “Medallions” are installed, the earth will tremble and a secret entrance will open on the right side. Where is the “Gold Holder Coin”. We take a coin and head to the center of the map, where the statues stand.
Central statues or Golden bowels.
Before sending to the passage, which is located in the statue, we recommend stocking up on food. To replenish health.
In one of the extreme statues, on the map, is a passage. Inside the aisle, below the staircase there is a place to install the found “Goldilocks coin”. After its installation, traps in the cave are activated.
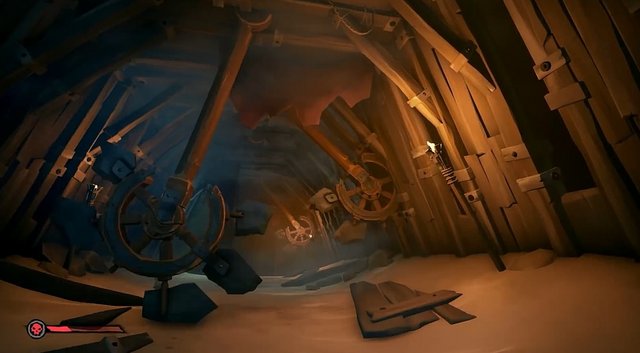
You need to go carefully, since the stakes can fish a character from once. Almost all adventures depend on the skill of the player. Since you need to run under traps on time. And carefully follow the narrow masts, due to a broken bridge.
When difficult places are traversed, several types of skeletons will come across. On black skeletons you need to shine a lantern, and then beat with a saber. Skeletons appear one wave after another.
Council for the passage of skeletons and traps in a cave.
The first location with an anchor.
To spend less time on skeletons, you need to leave one skeleton in the first wave. And do not kill him. Thus, the next wave of skeletons will not appear. So you can calmly twist the anchor and open the doors. If one skeleton shoots, then it will not take much health.
When the anchor is raised and the passage is open, the last skeleton can be removed. Another tunnel with traps will appear in the aisle. To run along it without loss, we recommend that you cuddle up to the right side and run.
The second location with an anchor.
The action with skeletons takes place in the same way as in the case in the first location, where there is an anchor. It is necessary to leave one or two skeletons and calmly raise the anchor. In this location you need to try to leave the skeleton with a gun.
After the anchor is full, there will again be a corridor with traps. Here you just need to jump over the traps.
The third location with traps and levers.
In this location you need to activate the “Levers” to open the passage. After activating the first lever, skeletons or a skeleton captain may appear. Try to look under your feet, in the woods there are traps that can kill a character at once.
All you need to activate the three levers and then the passage will open. All levers are located at the character level on the walls. The field of how the passage opens, you need to climb the wooden structure on the right, there is a diary.
Fourth location, treasury.
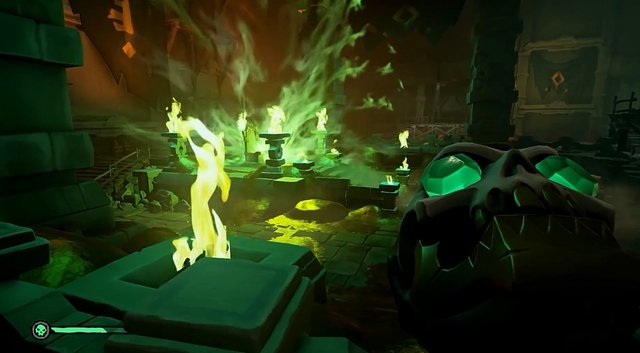
In the middle of the treasury temple is the boss “Gold Hoarder”. In its features, this boss is not much different from the “Briggs”. The same attacks and special abilities and a little more health points. To get from the musketon on it you need about 16-17 times.
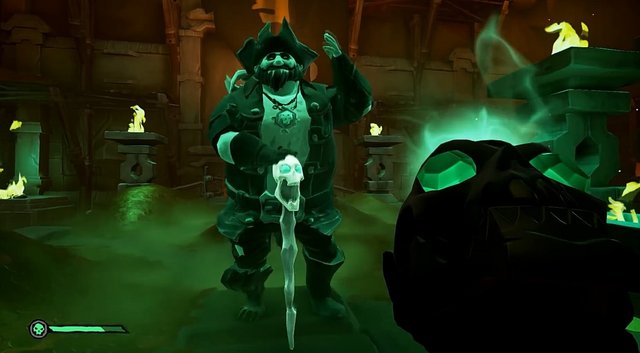
After defeating him, he explodes and gold scatters from him in different directions. And leaves in its place the “Skull of the gold holder.” After some time, green souls appear in the center of the throne, and the “High Pirate” appears in its place.
The “High Pirate” will not tell a big story and offer to leave the treasures where they lie. That there would be an opportunity to pass this story to other pirates. And from the award, you can sell the “Skull of the Gold-holder” to the “Order of Souls”.